How To Add Dynamic Validators Using SetValidators In Angular
In this article, We will learn how to add dynamic validators using SetValidators in Angular. SetValidators and SetAsyncValidators allow us to dynamically add Validators. FormControl, FormGroup, and FormArray can use this technique. There are numerous scenarios in which it is necessary to dynamically add or delete validators from a FormControl or FormGroup. When you have a Form Field whose value is determined by the value of another Form Field.
Adding the Validators Using the SetValidators
Syntax
The sync validators are added programmatically with setValidators. This function will remove any sync or async validators that were previously installed.
setValidators(newValidator: ValidatorFn | ValidatorFn[]): void
Examples:
this.myform.controls["mobile"].setValidators(Validators.required);

this.myform.controls["mobile"].setValidators([Validators.required,Validators.minLength(10)]);
setAsyncValidators
The setAsyncValidators method adds the Async validators programmatically.
setAsyncValidators(newValidator: AsyncValidatorFn | AsyncValidatorFn[]): void
Removing Validators Using clearValidators
There is no option that allows you to remove a single validator. To delete all validators from a control, use clearValidators.
this.myForm.controls['controlName'].clearValidators()
Update Validation Status
The validity status of the form or the control is not affected by removing or adding validators. Validators are only activated when the field's value is changed.
Using the updateValueAndValidity method, we can compel Angular to run the validations.
this.myForm.controls['controlName'].updateValueAndValidity()
SetValidators Example
The following example demonstrates how to use Angular's SetValidators.
We have two fields: email and mobile.
Using the drop-down box notifyVia, the user must select how he wants the system to notify him. Email and Mobile are the two options in the drop-down menu.
If the user selects an email, the email box must be made a Required field. If he selects Mobile, the mobile field must be made a required field.
To listen for changes, we subscribe to the notifyVia's valueChanges event and call the changeValidators method.
We check the value of notifyVia in the changeValidators function and use the setValidators method to add or remove the required validator. We also provide the email validator (for email fields) and the MinLength validator (for mobile fields).
Finally, we use the updateValueAndValidity method to have angular update the control's validity status.
Open the app.component.ts file and put the following code.
import { Component } from '@angular/core';
import { FormBuilder, FormGroup, FormControl, Validators } from '@angular/forms';

@Component({
  selector: 'app-root',
  templateUrl: './app.component.html',
})
export class AppComponent {
  title = 'setValidators';

  myform:FormGroup;

  notifyOptions = ["Email" ,"SMS"]

  constructor(private fb: FormBuilder) {

    this.myform = this.fb.group({
      email: new FormControl(''),
      mobile: new FormControl(''),
      notifyVia: new FormControl('',Validators.required),
    });

    this.myform.get("notifyVia").valueChanges
      .subscribe(data=> {
        this.changeValidators()
      })
  }


  changeValidators() {

    console.log(this.myform.get("notifyVia").value)

    if (this.myform.get("notifyVia").value=="Email") {
      this.myform.controls["email"].setValidators([Validators.required,Validators.email]);
      this.myform.controls["mobile"].clearValidators();
    } else {
      this.myform.controls["email"].clearValidators();
      this.myform.controls["mobile"].setValidators([Validators.required,Validators.minLength(10)]);
    }

    this.myform.get("email").updateValueAndValidity();
    this.myform.get("mobile").updateValueAndValidity();


  }
}
Add the following code under the app.component.html file.
<form formgroup="" myform="">

  notify :
<select formcontrolname="notifyVia">
  <option item="" ngfor="let item of notifyOptions" ngvalue="">{{item}}</option>
</select>
<br />
<br />


email :
<input formcontrolname="email" type="text" />
<br />
<br />
mobile :
<input formcontrolname="mobile" type="text" />
<br />
<br />

<button type="submit">Submit </button>
</form>

<br />
<br />

Form valid ---- {{myform.valid}}  <br />

email valid-- {{myform.controls['email'].valid}}  <br />

mobile valid -- {{myform.controls['mobile'].valid}}  <br />
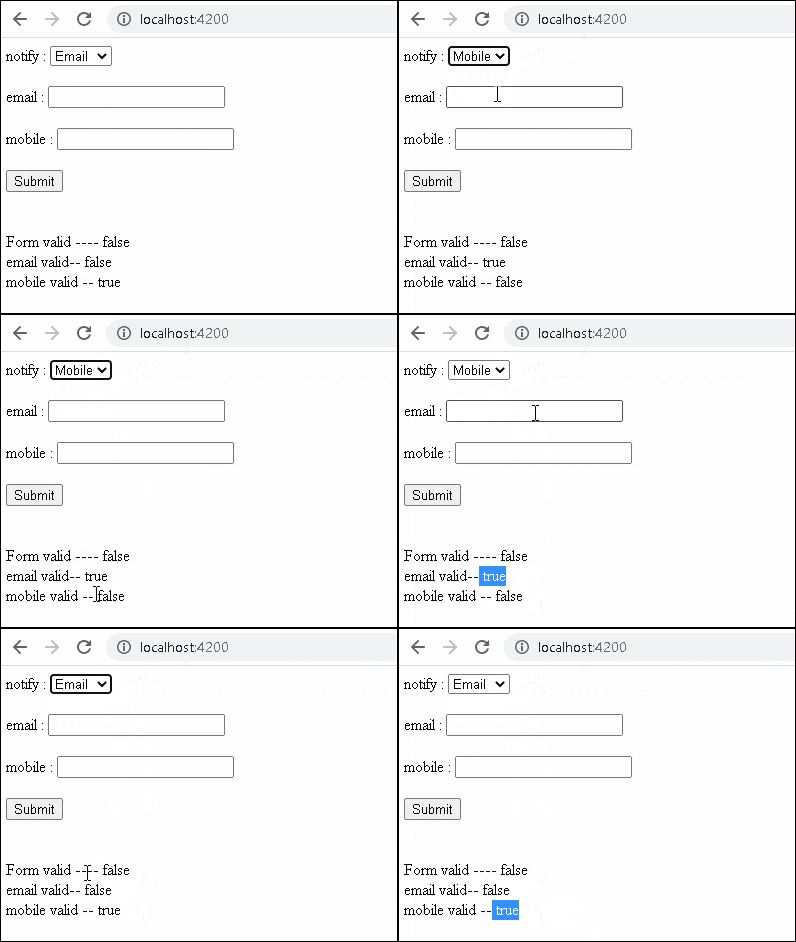
Now, run the application and see what the output screen that looks like below.
In this article, We covered how to add dynamic validators using SetValidators in Angular.
I hope this article helps you and you will like it.👍
If you have any doubt or confusion then free to ask in the comment section.

