How To Pass Data To Route In Angular
In this article, we will learn how to pass data to route in angular. We can pass data to the route using Angular. The route information can be static or dynamic. The static data is stored in the Angular route data property, which allows you to store any data related to this route. The historical state object can be used to pass dynamic data (or an object). The dynamic data from the historical state object can then be retrieved by the Routed Component.
Various ways of passing route data
Angular can provide data to Route in a variety of ways.
- Using URL or Route Parameter
- The Optional Parameter or Query Strings
- Using URL Fragment
- Static data using the data property
- Dynamic data using the state object
Passing static data to a route
At the time of route definition, we can configure the static data. The Angular route data property of the route is used to accomplish this. An array of arbitrary string key-value pairs can be stored in the route data attribute. Static data can be used to store information like page titles, breadcrumb text, and other read-only data.
Consider the following route, which has the data property set.
{ path: 'static', component: StaticComponent, data :{ id:'1', name:"Angular"}},
ngOnInit() {
      this.activatedroute.data.subscribe(data => {
          this.product=data;
      })
}
Passing Dynamic data to a Route
Providing the State value
Using routerLink directive
<a [routerLink]="['dynamic']" [state]="{ id:1 , name:'Angular'}">Dynamic Data</a>
Using navigateByUrl
this.router.navigateByUrl('/dynamic', { state: { id:1 , name:'Angular' } });
Accessing the state value
this.router.getCurrentNavigation().extras.state
Alternatively, using the ngOnInit's history.state.
console.log(history.state)
or use the Location Service's getState function. This procedure can be used. Angular 8+ is an advanced version of Angular.
import { Location } from '@angular/common';

export class SomeComponent
{
  products:Product[];

  constructor(private location:Location){
  }

  ngOnInit() {
    console.log(this.location.getState());
  }
}
Passing Data to the Routes Example
Passing static data example
import {Component, OnInit} from '@angular/core';
import { ActivatedRoute } from '@angular/router';

@Component({
     template: `<h1>Passing Static Data Demo</h1>
         {{product  | json}}`
})
export class StaticComponent implements OnInit {

     product:any;
     constructor(private activatedroute:ActivatedRoute) {
     }

     ngOnInit() {
          this.activatedroute.data.subscribe(data => {
               this.product=data;
           })
     }
}
Passing dynamic data (or object) example
import {Component, OnInit, ChangeDetectorRef} from '@angular/core';
import { ActivatedRoute, Router, NavigationStart } from '@angular/router';
import { map, filter} from 'rxjs/operators';
import { Observable} from 'rxjs/observable';

@Component({
     template: `<H1>Passing Dynamic Data Demo</H1>

     {{ product | json }}`
})
export class DynamicComponent implements OnInit {

     product;

     constructor(private router:Router, private activatedRoute:ActivatedRoute) {
          console.log(this.router.getCurrentNavigation().extras.state);
     }

     ngOnInit() {
          //console.log(history.state);
          this.product=history.state;
     }

}
import { Component } from '@angular/core';
import { ActivatedRoute, Router } from '@angular/router';

@Component({
  template: `
     <ul>
       <li><a [routerLink]="['/static']">Static Data</a></li>
       <li><a [routerLink]="['/dynamic']" [state]=product>Dynamic Data</a></li>
    </ul>

    <p>Id :   <input type="text" [(ngModel)]="product.id" > </p>
    <p>name :<input type="text" [(ngModel)]="product.name" > </p>
    <button (click)="gotoDynamic()" >Goto Dynamic Component</button>`
})
export class HomeComponent {

  public product = { id:'1', name:"Angular"};

  constructor(private router : Router) {
  }

  gotoDynamic() {
    //this.router.navigateByUrl('/dynamic', { state: { id:1 , name:'Angular' } });
    this.router.navigateByUrl('/dynamic', { state: this.product });
  }
}
import { Routes } from '@angular/router';

import { StaticComponent} from './static.component'
import { DynamicComponent } from './dynamic.component';
import { HomeComponent } from './home.component';

export const appRoutes: Routes = [
  { path: 'home', component: HomeComponent },
  { path: 'static', component: StaticComponent, data :{ id:'1', name:"Angular"}},
  { path: 'dynamic', component: DynamicComponent },
  { path: '', redirectTo: 'home', pathMatch: 'full' }
];
import { Component } from '@angular/core';

@Component({
  selector: 'app-root',
  template: `<div class="container">

  <nav class="navbar navbar-default">
    <div class="container-fluid">
      <div class="navbar-header">
        <a class="navbar-brand" [routerLink]="['/']"><strong> {{title}} </strong></a>
      </div>
    </div>
  </nav>

  <router-outlet></router-outlet>

  </div>`
})
export class AppComponent {
  title = 'Routing Module - Passing Dynamic / Static data route';
}
Add the following code under the app.module.ts file:
import { BrowserModule } from '@angular/platform-browser';
import { NgModule } from '@angular/core';
import { FormsModule } from '@angular/forms';
import { HttpModule } from '@angular/http';

import { RouterModule } from '@angular/router';

import { AppComponent } from './app.component';
import { StaticComponent} from './static.component'


import { appRoutes } from './app.routes';
import { DynamicComponent } from './dynamic.component';
import { HomeComponent } from './home.component';

@NgModule({
  declarations: [
    AppComponent,StaticComponent,DynamicComponent,HomeComponent
  ],
  imports: [
    BrowserModule,
    FormsModule,
    HttpModule,
    RouterModule.forRoot(appRoutes)
  ],
  providers: [],
  bootstrap: [AppComponent]
})
export class AppModule { }
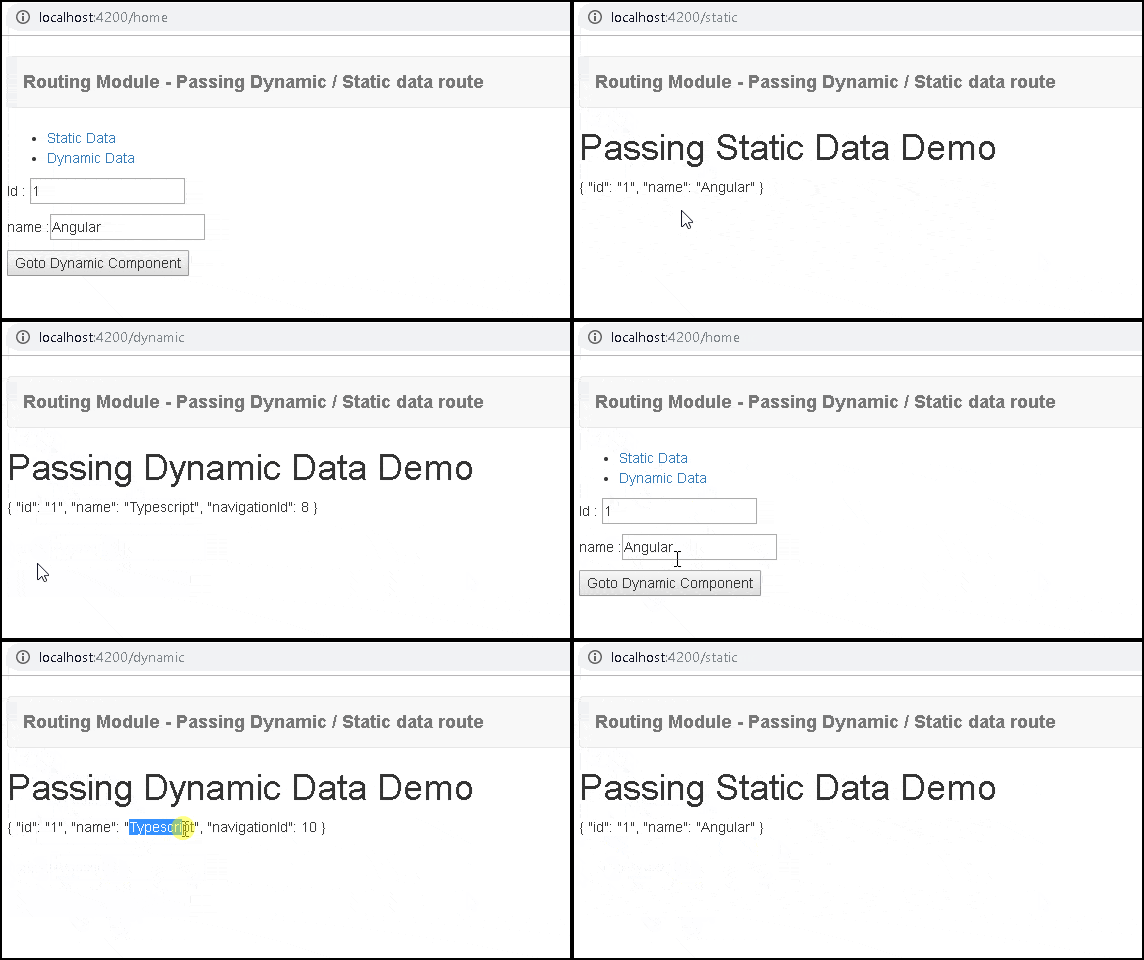
Now, run the application and see what the output screen that looks like below.

