@input, @output & EventEmitter In Angular
In this article, we will learn how to use @input, @output, and EventEmitter in Angular. These decorators are used to send data from the parent component to the child component and vice versa. @Input specifies the component's input property, which can be changed by the parent component. The @output specifies the output property (event), which is raised by the EventEmitter in the child component. These occurrences are relayed to the parent.
@input, @output & Eventemitter
@input
The input decorator transforms a property into an input property. That is, it is capable of receiving data from the parent component. Property binding is used by the parent component to connect it to a component property. Angular updates the value in the child component whenever the value in the parent component changes.
Example
Consider the component class below:
@Component({
  selector: 'app-customer-detail',
  templateUrl: './customer-detail.component.html',
  styleUrls: ['./customer-detail.component.css']
})
export class CustomerDetailComponent implements OnInit {
  @Input() customer:Customer;
}
<app-customer-detail customer="" selectedcustomer=""></app-customer-detail>
@output
Example
//Declare the property
@Output() customerChange:EventEmitter<customer> =new EventEmitter<customer>();

//Raise the event to send the data back to parent
update() {
  this.customerChange.emit(this.customer);
}
<app-customer-detail customer="" customerchange="" event="" selectedcustomer="" update=""></app-customer-detail>
EventEmitter
//Define  output property
@Output() customerChange:EventEmitter<customer> =new EventEmitter<customer>();

//Raise the event using the emit method.
update() {
  this.customerChange.emit(this.customer);
}
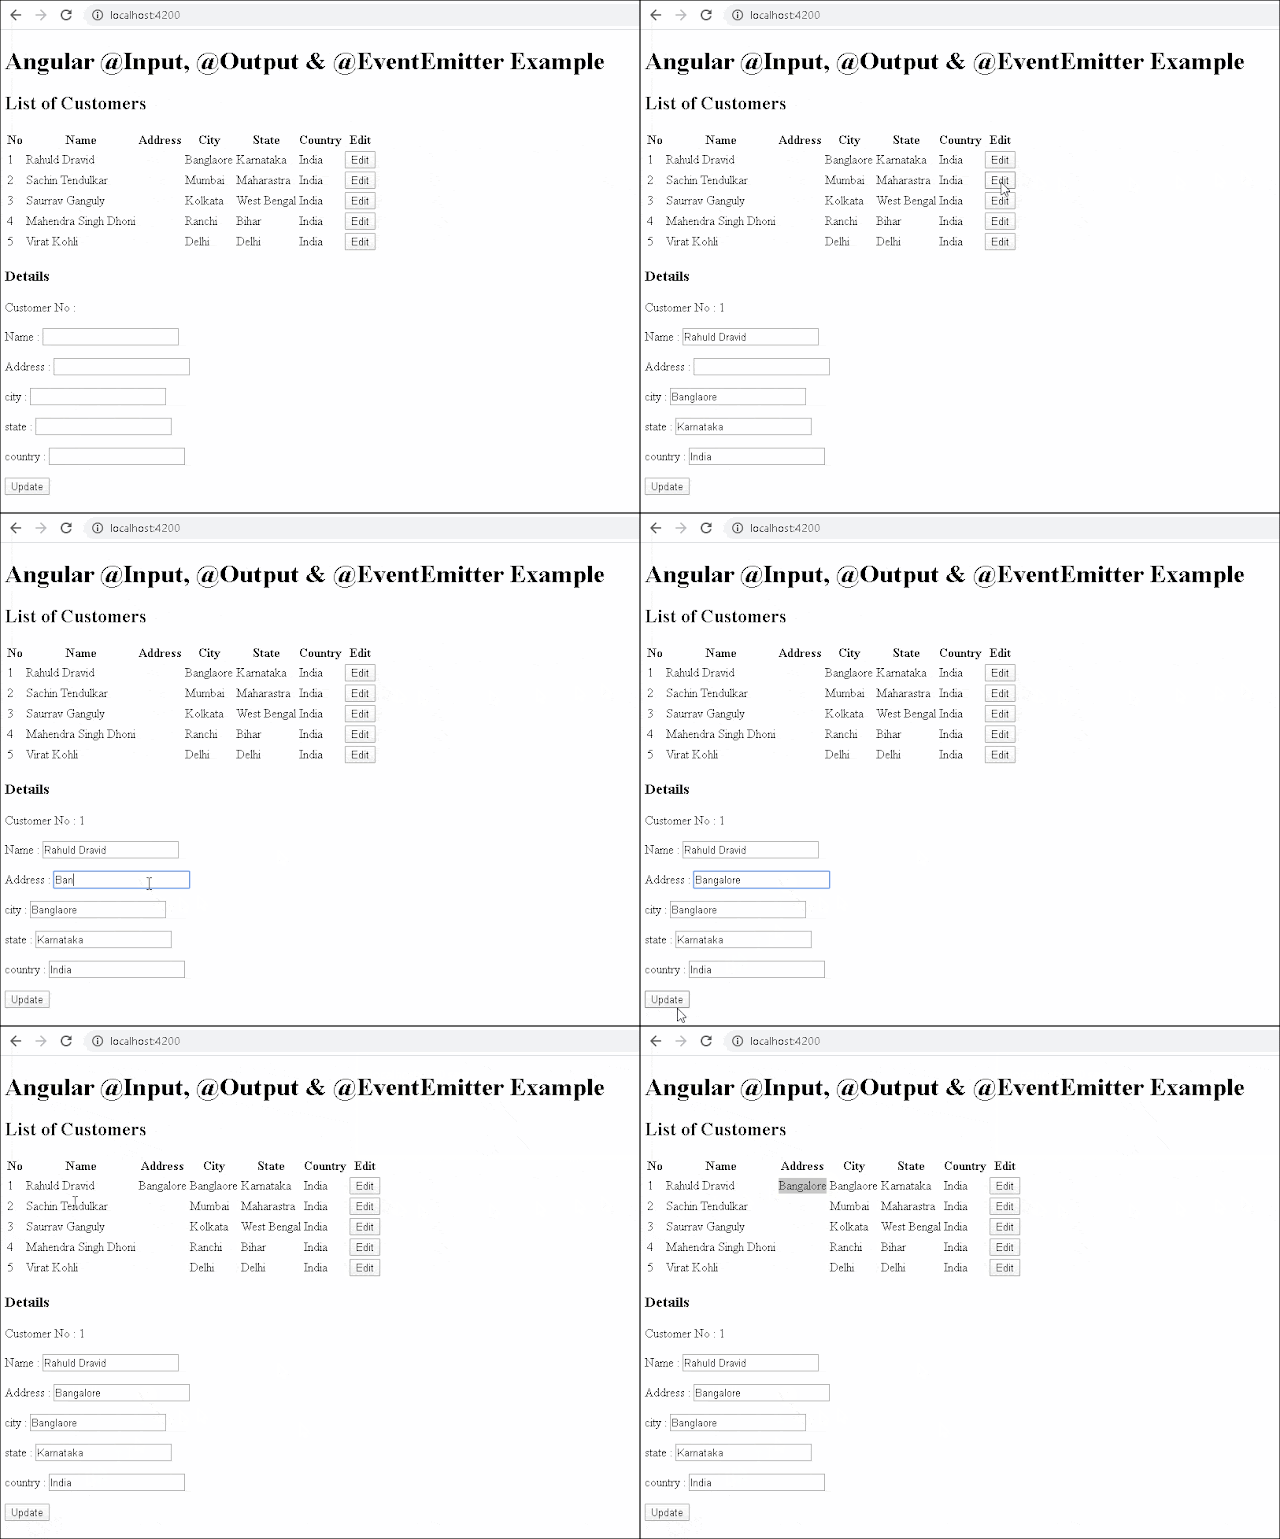
@input, @output & Eventemitter Example
ng new InputOutputExample

cd InputOutputExample
Create the components customerList and customerDetail. Create a customer class as well.
ng g c customerList
ng g c customerDetail
ng g class customer
Create customer class.
export class Customer {

  customerNo: number=0;
  name: string="";
  address: string="";
  city: string="";
  state: string="";
  country: string="";

}
import { BrowserModule } from '@angular/platform-browser';
import { NgModule } from '@angular/core';
import { FormsModule } from '@angular/forms'

import { AppRoutingModule } from './app-routing.module';
import { AppComponent } from './app.component';
import { CustomerListComponent } from './customer-list/customer-list.component';
import { CustomerDetailComponent } from './customer-detail/customer-detail.component';

@NgModule({
  declarations: [
    AppComponent,
    CustomerListComponent,
    CustomerDetailComponent
  ],
  imports: [
    BrowserModule,
    AppRoutingModule,
    FormsModule
  ],
  providers: [],
  bootstrap: [AppComponent],
})
export class AppModule { }
Child Component
import { Component, OnInit, Input, Output,EventEmitter } from '@angular/core';
import { Customer } from '../customer';

@Component({
  selector: 'app-customer-detail',
  templateUrl: './customer-detail.component.html',
  styleUrls: ['./customer-detail.component.css']
})
export class CustomerDetailComponent implements OnInit {

  @Input() customer:Customer = new Customer();
  @Output() customerChange:EventEmitter<customer> =new EventEmitter<customer>();

  constructor() { }

  ngOnInit() {
  }

  update() {
    this.customerChange.emit(this.customer);
  }

}
@Input() customer:Customer = new Customer();
customerChange is an output property of the EventEmitter type.
@Output() customerChange:EventEmitter<customer> =new EventEmitter<customer>();
We raise the event customerChange whenever the user changes the customer. We provide it the updated customer as an argument.
update() {
  this.customerChange.emit(this.customer);
}
The following code is the customer-detail.component.html file.
<p>Customer No : {{customer.customerNo}}</p>
<p>Name        : <input customer.name="" ngmodel="" /></p>
<p>Address     : <input customer.address="" ngmodel="" /></p>
<p>city     : <input customer.city="" ngmodel="" /></p>
<p>state     : <input customer.state="" ngmodel="" /></p>
<p>country     : <input customer.country="" ngmodel="" /></p>

<button click="" update="">Update</button>
Parent Component
<h2>List of Customers</h2>

<table class="table">
  <thead>
    <tr>
      <th>No</th>
      <th>Name</th>
      <th>Address</th>
      <th>City</th>
      <th>State</th>
      <th>Country</th>
      <th>Edit</th>
    </tr>
  </thead>
  <tbody>
    <tr ngfor="let customer of customers;">
      <td>{{customer.customerNo}}</td>
      <td>{{customer.name}}</td>
      <td>{{customer.address}}</td>
      <td>{{customer.city}}</td>
      <td>{{customer.state}}</td>
      <td>{{customer.country}}</td>
      <td><button click="" customer="" showdetails="">Edit</button></td>
    </tr>
  </tbody>
</table>

<h3>Details</h3>
<app-customer-detail customer="" customerchange="" event="" selectedcustomer="" update=""></app-customer-detail>
<button click="" customer="" showdetails="">Edit</button>
import { Component, OnInit } from '@angular/core';
import { Customer } from '../customer';
import { element } from 'protractor';
import { ObjectUnsubscribedError } from 'rxjs';

@Component({
  selector: 'app-customer-list',
  templateUrl: './customer-list.component.html',
  styleUrls: ['./customer-list.component.css']
})
export class CustomerListComponent implements OnInit {

  customers: Customer[] = [

    {customerNo: 1, name: 'Rahuld Dravid', address: '', city: 'Banglaore', state: 'Karnataka', country: 'India'},
    {customerNo: 2, name: 'Sachin Tendulkar', address: '', city: 'Mumbai', state: 'Maharastra', country: 'India'},
    {customerNo: 3, name: 'Saurrav Ganguly', address: '', city: 'Kolkata', state: 'West Bengal', country: 'India'},
    {customerNo: 4, name: 'Mahendra Singh Dhoni', address: '', city: 'Ranchi', state: 'Bihar', country: 'India'},
    {customerNo: 5, name: 'Virat Kohli', address: '', city: 'Delhi', state: 'Delhi', country: 'India'},

  ]

  selectedCustomer:Customer = new Customer();

  constructor() { }

  ngOnInit() {
  }

  showDetails(customer:Customer) {
    this.selectedCustomer=Object.assign({},customer)
  }

  update(customer:Customer) {
    console.log(customer)
    var cust=this.customers.find(e => e.customerNo==customer.customerNo)
    Object.assign(cust,customer)
    alert("Customer Saved")
  }
}
<app-customer-list></app-customer-list>
Notes on @Input & @Output
@Input(‘customerData’) customer:Customer;
Intercept input property changes with a setter
private _customerData = '';
@Input()
set customer(customer: Customer) {
  //You can add some custom logic here
  this._customerData = customer;
  console.log(this._customerData)
}
get customer(): string { return this._customerData; }

